

Creating functional storage solutions in your kitchen doesn't require professional installation or expensive custom work. A well-designed cabinet organizer can transform cluttered spaces into efficient storage areas that make daily cooking and meal preparation more enjoyable. Whether you're dealing with deep pantry cabinets, awkward corner spaces, or shallow drawers, DIY projects offer cost-effective ways to maximize every inch of available space while maintaining easy access to your essentials.
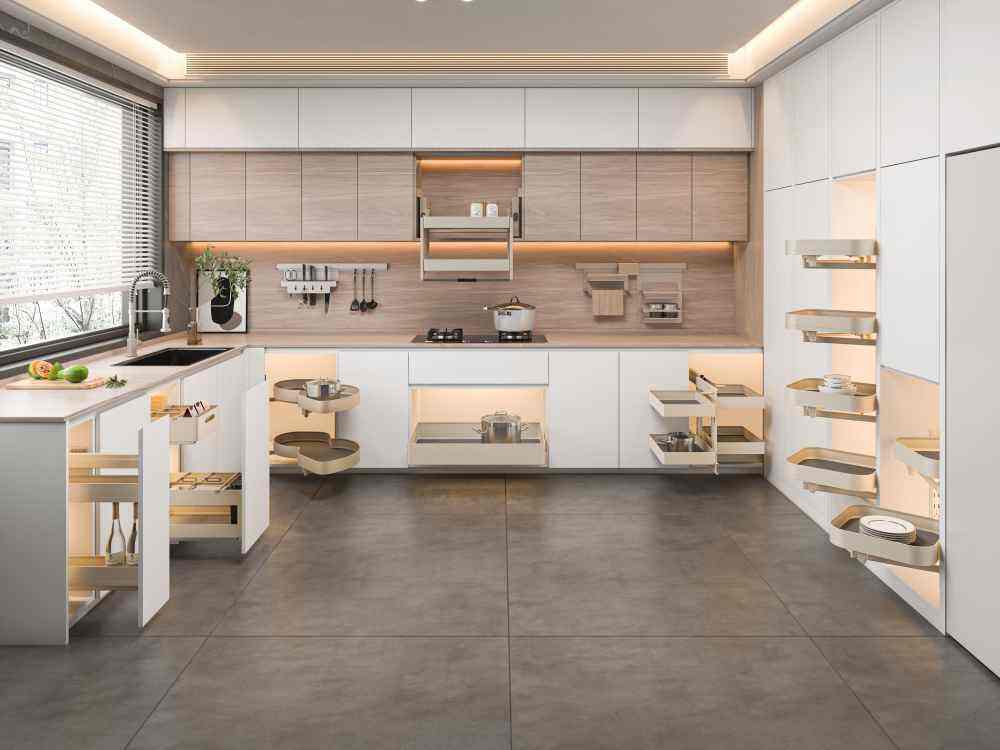
The beauty of DIY cabinet organization lies in customization possibilities that perfectly match your specific needs and available space dimensions. Unlike one-size-fits-all commercial solutions, homemade organizers can accommodate unique cabinet configurations, unusual item shapes, and personal preferences for accessibility and visual appeal. These projects also provide significant cost savings compared to professional organizer systems while offering the satisfaction of creating something functional with your own hands.
Essential Materials and Tools for Cabinet Organization Projects
Basic Construction Materials
Successful cabinet organizer projects begin with selecting appropriate materials that balance durability, cost, and ease of working. Plywood sheets in quarter-inch and half-inch thicknesses provide excellent structural support for dividers and shelving components. Pine boards offer a budget-friendly option for simpler projects, while hardwood materials like oak or maple deliver premium durability for heavily used storage areas.
Plastic containers and bins serve as excellent foundations for modular organization systems, especially when combined with wooden frames or dividers. Clear acrylic sheets can create elegant see-through compartments that maintain visual continuity while providing practical separation. Metal wire grids and baskets add industrial appeal while offering excellent ventilation for items that benefit from air circulation.
Required Tools and Hardware
A comprehensive tool collection ensures smooth project execution and professional-looking results. Essential cutting tools include a circular saw or miter saw for precise lumber cuts, along with a jigsaw for curved or irregular shapes. Drill bits in various sizes accommodate different screw types and pilot holes, while a router can add decorative edges or create precise dados for sliding components.
Hardware selection significantly impacts both functionality and longevity of your cabinet organizer systems. Drawer slides enable smooth pull-out functionality, while adjustable shelf pins allow for future reconfiguration as storage needs evolve. Wood screws, corner brackets, and L-shaped supports provide structural integrity, especially for weight-bearing applications like pot storage or small appliance organization.
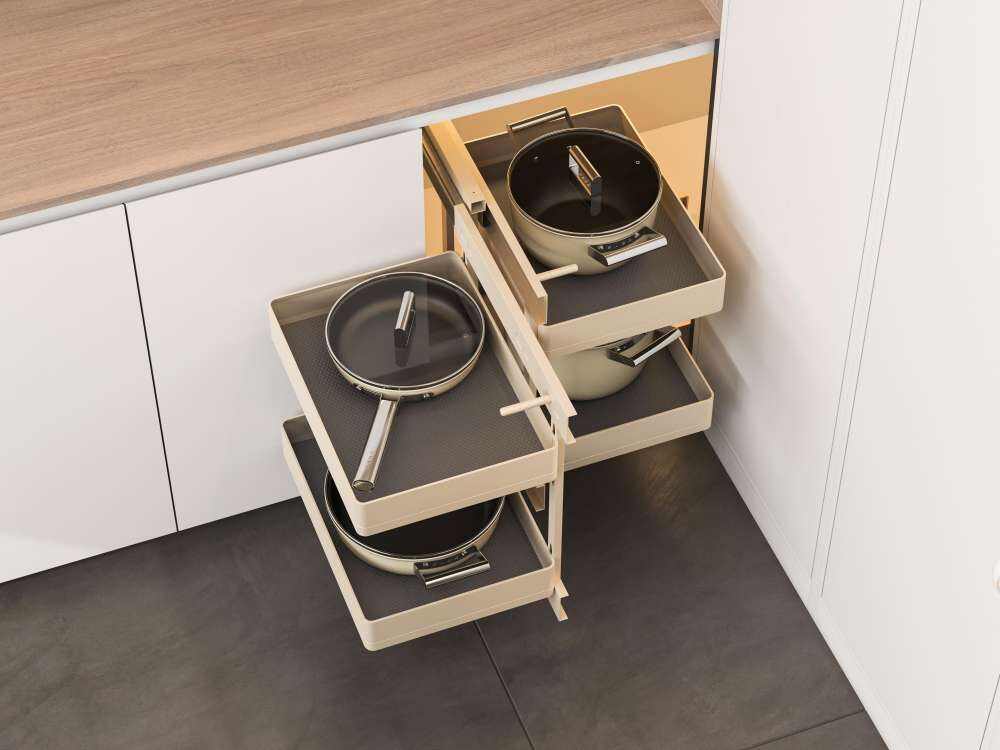
Pull-Out Drawer Systems for Deep Cabinets
Planning and Measuring for Drawer Installation
Deep cabinets present unique challenges that a properly designed cabinet organizer can effectively address through pull-out drawer systems. Begin by carefully measuring internal cabinet dimensions, accounting for door hinges, existing shelves, and any plumbing or electrical components that might interfere with drawer operation. Standard cabinet depths typically range from 12 to 24 inches, requiring different approaches for optimal accessibility.
Consider the weight capacity requirements based on intended contents when planning drawer construction. Heavy items like pots, canned goods, or small appliances demand robust drawer boxes with full-extension slides rated for appropriate weight loads. Lighter items such as spices, packets, or utensils can utilize simpler construction methods with standard drawer slides while still providing excellent organization benefits.
Building Custom Drawer Boxes
Constructing custom drawer boxes allows precise fitting within existing cabinet frameworks while accommodating specific storage requirements. Start by cutting plywood pieces for front, back, and side panels, ensuring square corners through careful measurement and proper sawing techniques. Dado joints or rabbet joints create strong connections between panels, while pocket screws offer a simpler assembly method for beginners.
Bottom panels should extend slightly beyond side walls to rest in grooves cut into the surrounding frame pieces, creating a sturdy foundation that distributes weight evenly across the drawer structure. Apply wood glue to all joint surfaces before assembly, then secure with appropriate fasteners while checking for square alignment throughout the process. Sand all surfaces smooth before applying your chosen finish to match existing cabinet interiors or create contrasting accents.
Vertical Divider Systems for Efficient Space Utilization
Creating Adjustable Divider Configurations
Vertical dividers transform wide cabinet spaces into organized storage zones that prevent items from shifting and becoming disorganized. An effective cabinet organizer system incorporates adjustable dividers that can accommodate changing storage needs over time. Create a grid system using thin plywood strips that slide into dadoes cut into horizontal base and top pieces, allowing for easy reconfiguration when necessary.
Consider the types of items you'll be storing when determining divider spacing and height requirements. Baking sheets and cutting boards require tall, narrow compartments, while serving platters need wider spaces with moderate height clearance. Pot lids benefit from closely spaced vertical slots that keep them organized and easily accessible without stacking or nesting.
Installing Permanent Divider Solutions
Permanent divider installations offer maximum stability for frequently accessed storage areas where configuration changes are unlikely. Route shallow grooves into cabinet floors and ceilings to accommodate divider panels that slide securely into position. This approach creates rock-solid organization that won't shift under normal use while maintaining clean, professional appearance.
When installing permanent systems, pay careful attention to spacing measurements and ensure all grooves align perfectly for smooth divider insertion. Use a router with an edge guide or create a simple jig to maintain consistent groove depth and positioning across multiple cuts. Test-fit all components before final assembly, making any necessary adjustments to ensure smooth operation and proper alignment.
Specialized Storage Solutions for Unique Items
Spice Organization and Small Container Storage
Spice storage represents one of the most challenging aspects of kitchen organization, where a thoughtfully designed cabinet organizer can make tremendous differences in cooking efficiency and ingredient accessibility. Create tiered shelving systems that display spice containers at angles that make labels clearly visible while maximizing vertical space utilization. Shallow risers built from thin wood strips elevate back rows above front containers, eliminating the need to move multiple jars to access desired spices.
Consider magnetic spice storage solutions for cabinet doors, using thin metal sheets adhered to door interiors with strong magnetic spice containers that stay securely in place during door operation. This approach keeps spices visible and accessible while freeing up interior cabinet space for larger items. Alternatively, create pull-out spice racks using narrow drawer slides and shallow wooden trays that bring entire spice collections forward for easy selection.
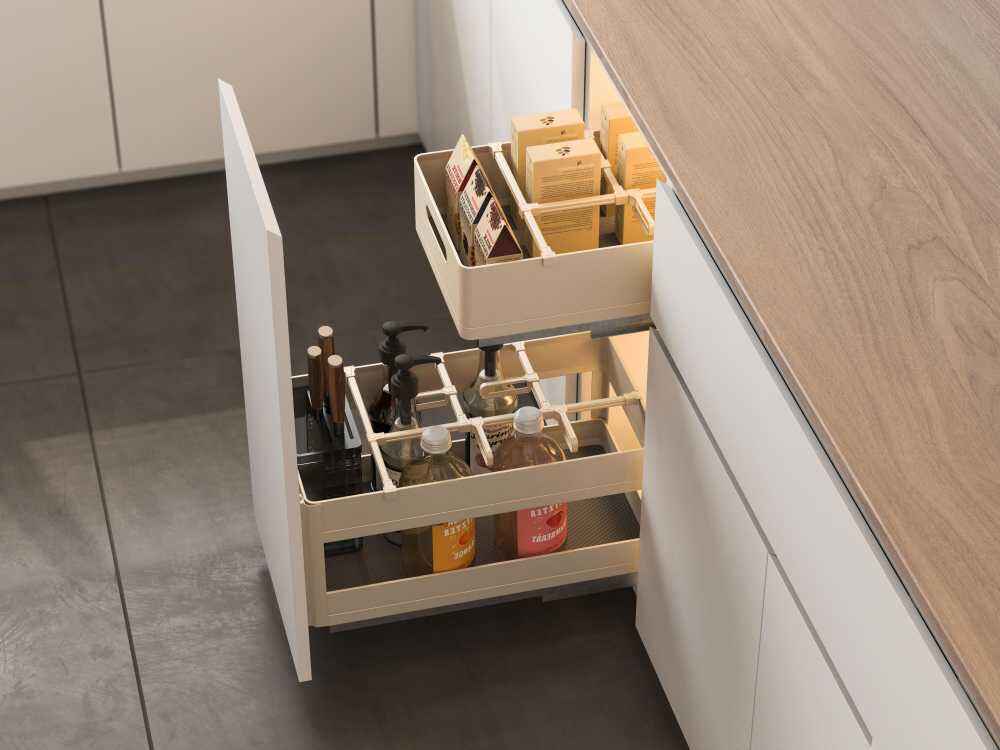
Cleaning Supply Organization and Safety
Cleaning supplies require specialized storage considerations that prioritize both organization and safety, particularly in households with children or pets. Design a cabinet organizer system that includes secure storage for potentially dangerous products while maintaining easy access for adult users. Install child-proof latches on cabinets containing hazardous materials, and consider elevated storage solutions that keep dangerous products well above reach of curious hands.
Create dedicated compartments for different categories of cleaning supplies, separating kitchen cleaners from bathroom products to prevent cross-contamination and confusion. Use adjustable shelving that accommodates containers of various sizes, from spray bottles to bulk refill containers. Include hooks or clips for hanging items like rubber gloves, scrub brushes, or microfiber cloths that benefit from air drying between uses.
Installation Techniques and Professional Finishing
Proper Mounting and Stabilization Methods
Successful installation of any cabinet organizer system depends on secure mounting techniques that ensure long-term stability and smooth operation. Begin by locating and marking all mounting points, using a level to ensure proper alignment and prevent binding or uneven wear over time. Pre-drill pilot holes to prevent wood splitting, particularly when working near cabinet edges or corners where structural integrity is most important.
When installing drawer slides, pay careful attention to manufacturer specifications regarding mounting screw locations and weight capacity ratings. Use screws that penetrate at least three-quarters of an inch into solid wood for maximum holding power, and consider reinforcing mounting points with additional blocking if necessary. Test all moving components thoroughly before loading them with storage items to identify and correct any operational issues.
Finishing Touches and Protective Measures
Professional-looking results require attention to finishing details that protect your cabinet organizer investment while enhancing visual appeal. Sand all visible surfaces progressively through finer grits, ending with 220-grit sandpaper for smooth, splinter-free finishes. Apply appropriate protective coatings based on expected moisture exposure and cleaning requirements, choosing water-based polyurethane for easy cleanup and low odor characteristics.
Consider adding soft-close mechanisms to drawer systems and pull-out shelves to reduce noise and prevent damage from aggressive closing. Install rubber bumpers or felt pads at contact points to minimize wear and eliminate rattling sounds during normal operation. These small details significantly enhance the user experience and extend the functional life of your organization system.
Maintenance and Long-Term Optimization
Regular Cleaning and Upkeep Procedures
Maintaining your cabinet organizer system requires regular attention to ensure continued functionality and appearance over years of daily use. Establish monthly cleaning routines that include emptying compartments, wiping down all surfaces, and checking for loose hardware or wear indicators. Use mild detergents and avoid harsh chemicals that might damage protective finishes or cause swelling in wood components.
Inspect moving parts regularly for smooth operation, applying appropriate lubricants to drawer slides and pivot points as recommended by manufacturers. Look for signs of excessive wear or damage that might indicate need for adjustments or component replacement. Address minor issues promptly to prevent larger problems that could compromise the entire organization system.
Adapting Systems for Changing Needs
The most successful cabinet organizer designs incorporate flexibility that allows for modifications as household needs evolve over time. Document your original construction methods and measurements to facilitate future alterations or expansions. Keep leftover materials and hardware for repairs or additions, storing them in labeled containers for easy retrieval when needed.
Consider seasonal adjustments that optimize storage for different cooking patterns or entertaining requirements. Summer barbecue seasons might prioritize outdoor dining supplies, while holiday baking periods could benefit from enhanced access to specialty ingredients and equipment. Plan these transitions in advance, identifying which components can be easily relocated or reconfigured without major reconstruction efforts.
FAQ
What basic tools do I need to build a simple cabinet organizer?
Essential tools include a drill with bits, circular saw or miter saw, measuring tape, level, and screwdrivers. For more complex projects, add a router, clamps, and sandpaper. Most cabinet organizer projects can be completed with standard home workshop tools, though power tools significantly speed up the construction process and improve accuracy of cuts and holes.
How do I determine the right dimensions for custom drawer organizers?
Measure your cabinet interior dimensions carefully, subtracting space needed for drawer slides and clearances. Account for door swing, existing hinges, and any plumbing or obstacles. Plan compartment sizes based on items you'll store, leaving extra space for easy removal and cleaning. Test measurements with cardboard mockups before cutting expensive materials.
Can I install pull-out drawers in existing cabinets without major modifications?
Most standard cabinets can accommodate pull-out drawer systems with minimal modifications. Remove existing shelves and install mounting hardware according to slide manufacturer specifications. Some face frame cabinets may require minor trimming for proper clearance, but major structural changes are rarely necessary for basic cabinet organizer installations.
What's the best way to prevent items from sliding around in drawer organizers?
Use non-slip drawer liner material, create compartments sized appropriately for stored items, and add dividers or small containers to keep things separated. Felt-lined compartments work well for delicate items, while textured rubber mats provide grip for heavier objects. Design compartments slightly smaller than items to ensure snug fit without difficult removal.
Table of Contents
- Essential Materials and Tools for Cabinet Organization Projects
- Pull-Out Drawer Systems for Deep Cabinets
- Vertical Divider Systems for Efficient Space Utilization
- Specialized Storage Solutions for Unique Items
- Installation Techniques and Professional Finishing
- Maintenance and Long-Term Optimization
- FAQ